Close and Save a Drawing
-
When you have finished editing your drawing you can now Close and Save it.
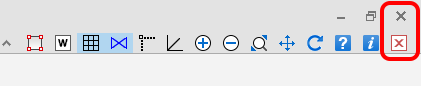
You can either click on the Grey cross in the top right of your screen to close the whole program, or you can click on the Red cross to only close the drawing you have open. Both are highlighted below.
-
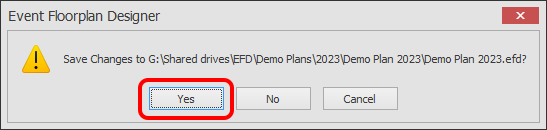
After clicking one of the crosses above you will be asked if you want to Save your drawing, at this point click YES.
IMPORTANT: If you click NO instead, any changes you have made will be lost. However, you still have one more chance to go back to your floorplan before losing everything, see step 3 below.
If you click Cancel, you will be taken back to your floorplan so you can edit it further if required.
-
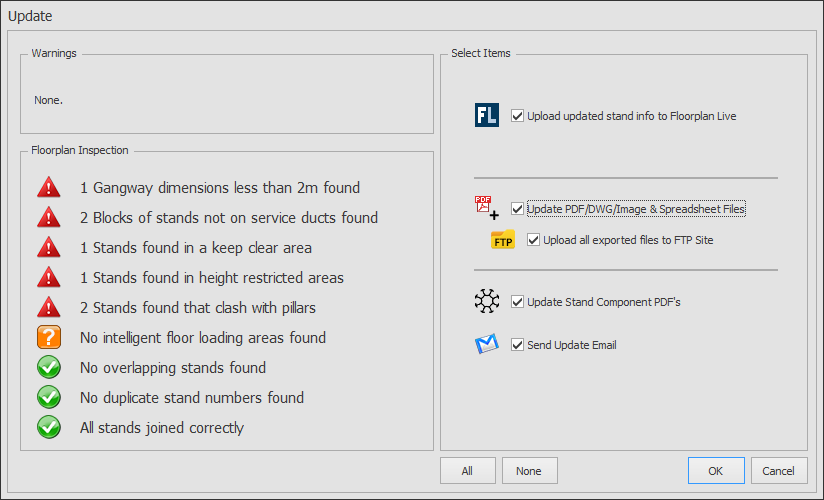
After clicking YES or NO, the following box will appear highlighting any warnings or problems that have been found with your floorplan, plus a few actions that will be performed after clicking OK.
At this point, if you click Cancel, it will take you back to your floorplan for further editing if required.
See below for more information about the Warnings, Floorplan Inspection and Actions sections.
If you are happy with the warnings and actions that are ticked, click OK to start the actions. A progress bar will appear in the bottom right of your screen while the actions are processed, then once processing has finished, your floorplan will disappear from the screen.
Warnings:
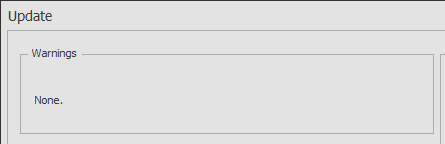
There are various warnings that can appear here. If you see a warning and are unsure what it means, please contact us.
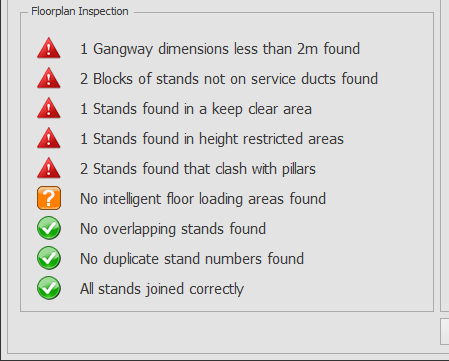
Floorplan Inspection:
If you see any problems in the Floorplan Inspection section, you can click Cancel on this dialog to return back to your floorplan and run the Inspect Floorplan function manually which will help you find the problems.
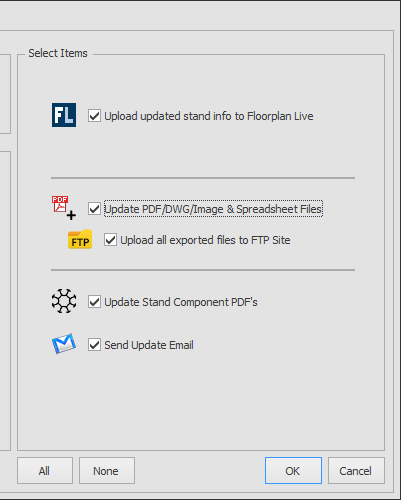
Actions:
All of the these actions will be ticked automatically if these functions have been enabled on your floorplan. You can untick these actions if you don't want them to run when you close this dialog, but it is recommended that you leave them all ticked and let everything update automatically.
Upload updated stand info to Floorplan Live - Leave this ticked to make sure your updated floorplan gets uploaded to Floorplan Live and keeps both plans in sync. You can set what Views are uploaded to Floorplan Live with these instructions.
Update PDF/DWG/Image & Spreadsheet Files - Leave this ticked so that all the related files are updated automatically for you.
See here about setting what files are exported from View.
Help with creating the Meterage Report spreadsheet automatically is coming soon. In the meantime, you can export the Meterage Report spreadsheet manually.
Help with exporting the Time Log automatically is coming soon.
Upload all exported files to FTP Site - Leave this ticked so that all the files you have set to be uploaded with the FTP function are uploaded automatically.
Update Stand Components PDFs - Leave this ticked so the Stand Component Calculator exports all of the relevant files.
Send Update Email - If you have setup Email Notification, this tick box will be ticked for you automatically. Leave this ticked so that the notification email(s) is sent.