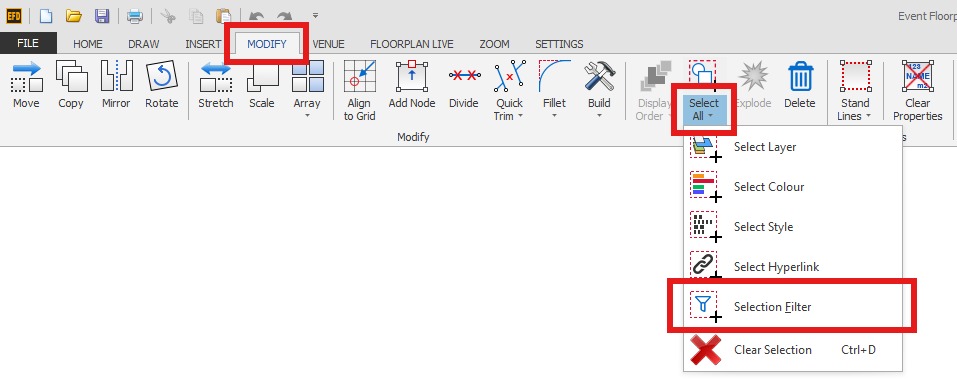
You can select certain items in EFD using the Selection Filter. It is on the MODIFY menu, under the Select All button (the arrow below it).
TIP: Before using this function it is best to unlock all layers first, because it needs to select the entities, which it can't do if the layers are locked. See Unlock Layers - Layer Manager.
NOTE: This function cannot find anything within one of our venue templates.
-
On the MODIFY menu, click the arrow under Select All, then choose Selection Filter.
-
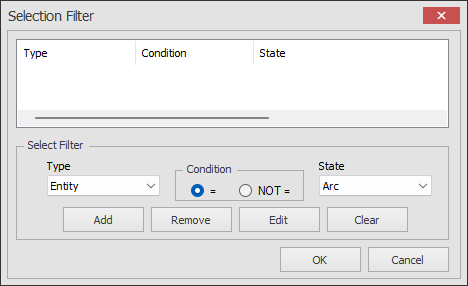
The Selection Filter dialog will appear. It is best to start with an empty box, so click Clear if there is already anything in the box, or select an existing item and click Remove.
-
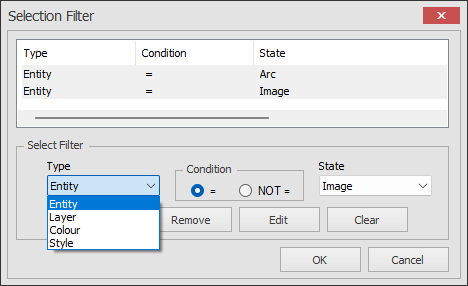
Choose the Type. There are different types to choose from: Entity, Layer, Colour and Style.
You can also specify whether the condition equals (=) or doesn't equal (NOT =) the selection.
Choose the State (the item you want to filter), then click Add.
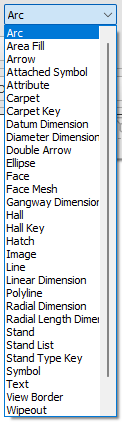
The items you can filter are: Arc, Area Fill, Arrow, Attached Symbol, Attribute, Carpet, Carpet Key, Datum Dimension, Diameter Dimension, Double Arrow, Ellipse, Face, Face Mesh, Gangway Dimension, Hall, Hall Key, Hatch, Image, Line, Linear Dimension, Polyline, Radial Dimension, Radial Length Dimension, Stand, Stand List, Stand Type Key, Symbol, Text, View Border, Wipeout, Zone and Zone Key.
Zone and Zone Key are at the bottom of the list.
TIP: You can filter multiple items in the list, but it is best to do one at a time to give the best results.
-
Click OK. The matching items are selected.